
Do you have uneven walls in your home? If so, don’t worry – you’re not alone! Many homeowners struggle with this issue. Luckily, there is a solution: wall leveling. In this article, we will discuss what causes uneven walls and how to fix them using a wall leveling system. We’ll also provide tips on how to choose the right system for your needs. So if your walls are giving you grief, read on for some helpful advice!
Fix Uneven Wall’s Frame
The most common cause of uneven walls is the frame. Every wall needs a solid, level frame in order to be perfectly even. If your walls have an uneven frame, it will cause them to bulge or dip in certain areas, creating an uneven surface.
To fix this problem, you must first assess the condition of your wall frames. Look for soft spots, gaps between the boards and any other signs of damage or rot. Then replace any damaged sections with new wood framing pieces. Once your frames are all secured and properly attached to each other, they should be level and ready to start fixing your walls. [1]
Use Cardboard Shims For Framing
If the frames are level, but you still have uneven walls, it is likely because there are gaps between the frames. To fix these gaps and even out your walls, use cardboard shims. Cardboard shims are thin pieces of cardboard that can be inserted into the framing gap to give it a more even surface area. Make sure to use cardboard shims that are slightly larger than the opening so they won’t fall out once you put them in place.
Use A Wood Planer
If your walls still have uneven surfaces after shimming, you should use a wood planer to level them. A wood planer is a tool that can be used to shave down the high points in a wall and make it perfectly even. When using one, make sure to go slowly and check the surface of the wall frequently for any signs of damage or imperfections. [2]
Install Wall Panels Or Papers To Hide Imperfections
Once you have finished leveling your walls, it is important to cover up any imperfections or gaps. To do this, you can install wall panels or wallpaper over the entire surface of the wall. This will help to hide any bumps, gaps or other imperfections that may be present and make your walls look perfectly even once again.
Avoid Adding Skim On Sanding
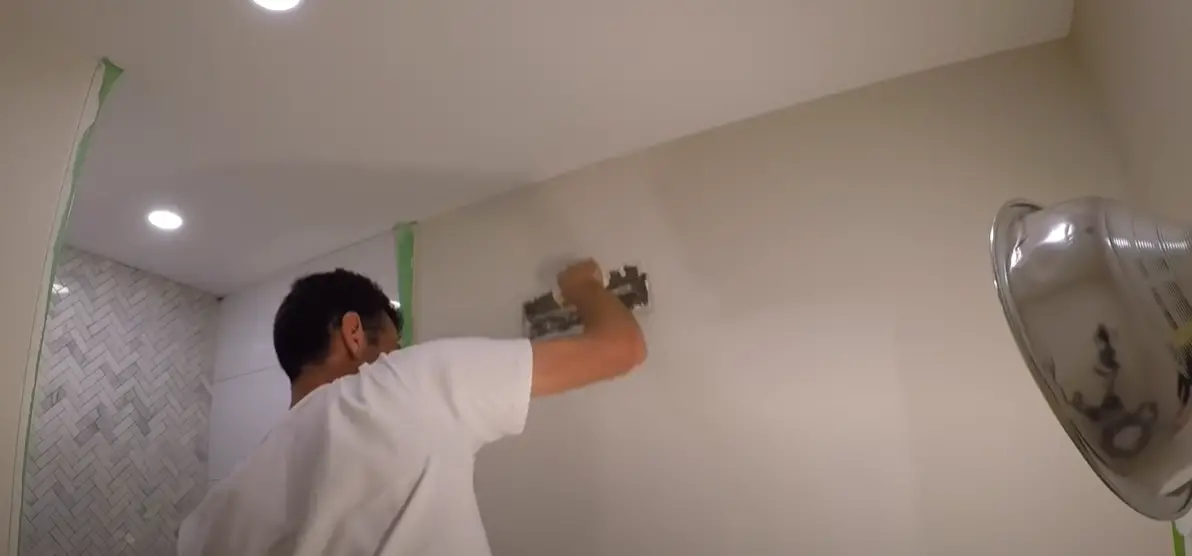
When making repairs to uneven walls, many people tend to reach for a skim coat of plaster or joint compound. While this can help smooth out the surface, it also adds additional material which can cause further problems down the line. A better way to even out your walls is by using drywall sanding techniques.
Focus On Safety Considerations While Skimming Or Framing An Uneven Wall
Finally, keep in mind that wall leveling is a job that should be done carefully and with safety in mind. Always wear protective clothing and eye protection when working with drywall and other materials, and make sure the area you’re working in is well-ventilated to avoid breathing in any dust particles.
Painting over old, uneven walls
Once your walls are level, you can paint them to give them a fresh look. Before painting, make sure to fill in any holes or gaps in the wall with a joint compound. This will help ensure even coverage and an even finish.
When it comes to painting over old, uneven walls, it’s important to use quality paints that are designed for walls. Choose a matte finish for best results as glossy finishes tend to highlight imperfections more than matte ones.
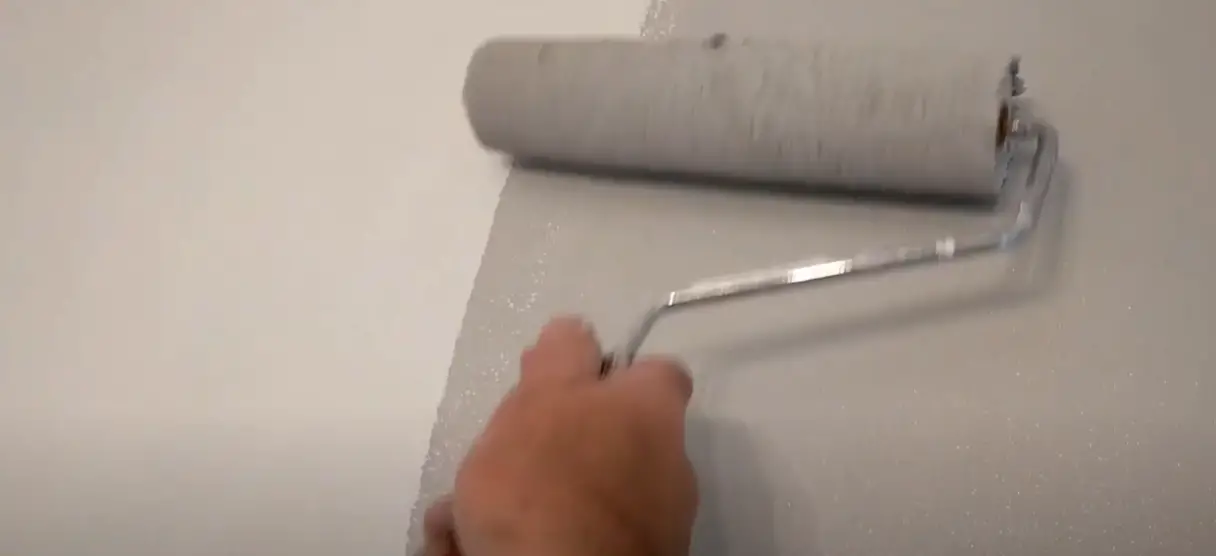
You can also use special techniques such as spackling or stippling to hide imperfections in the wall if necessary. Spackling involves using a thicker type of paint and applying it in a circular or cross-hatch pattern over larger areas of unevenness while stippling involves dabbing the paint over spots of unevenness with a brush or roller.
Uneven walls can be an eyesore but with the right tools and techniques, they can easily be fixed. By shimming, using a wood planer, installing wall panels or papers and taking safety precautions when sanding or skimming, you can have perfectly level walls in no time! Don’t forget to finish things off by using quality paints and sealing them afterwards for long-lasting results. With the right knowledge and effort, you can make any room look great with even walls!
Tackling damp walls
If you’re dealing with uneven walls that are also damp, the first step is to identify what’s causing the problem. It could be a plumbing issue, roof leak or even poor drainage around the foundation of your home. Once you’ve identified the source of the moisture, take steps to repair it.
Once the underlying cause has been addressed and the wall is dry, you can then proceed with leveling it. If there is any mold on your walls due to dampness, use a mixture of bleach and water to eradicate it before proceeding with any repairs.
When tackling damp walls, use waterproof products like cement-based plasters or latex paints when making any repairs. These will help ensure your walls don’t get damaged from excessive moisture in the future.
Painting over plaster
Painting over plaster walls can be a bit more complicated than painting over drywall, but with the right preparation and tools, it’s definitely doable.
If your plaster walls are in need of some TLC before you start painting, make sure to patch any holes or cracks and then sand them down for a smooth finish. You can also use joint compound if needed to fill in any gaps between the wall and trim.
When it comes to choosing paint for your plaster walls, make sure to pick one that is designed specifically for this surface type; ordinary paints may not adhere properly and could result in an uneven finish. Also avoid using oil-based primers as they can cause problems when trying to apply a second coat of paint.
Painting over plaster walls can be a bit more challenging than painting over drywall, but with the right preparation, tools and products, you can easily achieve an even finish and make any room look great! Just remember to patch holes or cracks first before painting and use quality paints designed specifically for plaster surfaces to get the best results. Don’t forget to seal your newly painted walls afterwards for long-lasting results!
How to Fix Uneven Walls: A Step-by-Step Guide
Uneven walls can be a cosmetic concern and impact the aesthetics of your home. Below, we provide a detailed guide on how to fix uneven walls, from identifying the cause to implementing solutions to achieve a smoother and more appealing wall surface.
| Step | Action | Advantages |
|---|---|---|
| Step 1: Identify the Cause | Determine if the unevenness is due to structural issues, settling, water damage, or improper installation. | Pinpoints the root cause for appropriate repairs. |
| Step 2: Prepare the Area | Clear the area, remove wall decorations, and protect floors and furniture from dust and debris. | Ensures a clean and safe working environment. |
| Step 3: Repair Small Cracks | Fill small cracks with spackling compound or joint compound, and sand the area once dry. | Addresses minor imperfections and creates a smooth surface. |
| Step 4: Address Large Imperfections | For larger issues, use joint compound and mesh tape to create a strong foundation for repairs. | Provides stability for more substantial repairs and prevents future cracks. |
| Step 5: Apply Skim Coat | Apply a thin layer of joint compound (skim coat) to the entire wall to create an even surface. | Creates a uniform finish and covers imperfections. |
| Step 6: Sand and Smooth | Once the skim coat is dry, sand the surface to achieve a smooth and even texture. | Prepares the wall for paint or other finishes. |
| Step 7: Prime and Paint | Prime the repaired area and the entire wall, then paint to match the existing color. | Ensures a cohesive appearance and lasting results. |
| Step 8: Check for Structural Issues | If the unevenness persists, consult a professional to assess potential structural problems. | Addresses any underlying issues that require expert attention. |
Explanation of the Table:
- Step 1: Identifies the importance of understanding the cause for appropriate solutions.
- Step 2: Prepares the workspace and prevents damage to surrounding areas.
- Step 3: Explains how to address small cracks and minor imperfections.
- Step 4: Guides through repairing larger issues to establish a strong foundation.
- Step 5: Describes applying a skim coat to create an even surface.
- Step 6: Covers sanding to achieve a smooth texture for finishing.
- Step 7: Explains priming and painting for a cohesive look.
- Step 8: Emphasizes the importance of consulting professionals for structural concerns.
Following these steps will guide you through the process of fixing uneven walls and achieving a polished and appealing finish in your home.
FAQ
How do you fix an uneven wall before tiling?
Before tiling, make sure to level the walls using a spirit level and apply a bonding agent to create an even surface. It’s also important to prepare your wall by removing any dirt, dust or peeling paint before you start tiling. After that, you should use tile spacers to ensure your tiles are evenly spaced and then grout them once they’re in place. Finally, finish up by wiping down the tiles with a damp cloth and allowing them to dry thoroughly before applying sealant.
Why are my walls bumpy?
Bumpy walls are usually caused by poor workmanship during the wall construction process. The bumps may be due to unevenly applied plaster, improperly hung drywall or inadequate taping and mudding of the joints. If you notice any bumps on your walls, make sure to repair them with joint compound and sand them down for a smooth finish before painting or applying wallpaper. [3]
Why can I see lines in my walls?
You may be able to see lines in your walls if the wall has been covered with a material like wallpaper or paneling which has shrunk over time. This is usually due to excessive moisture and can cause the underlying material, such as plaster or drywall, to pull away from the surface of the wall. If you notice any lines in your walls, make sure to repair them by patching any cracks or holes and then sand them down for a smooth finish before painting or applying new wallpaper.
What is wall ghosting?
Wall ghosting is a term used to describe the appearance of an image or pattern on a wall which appears to be from something that has been removed. This can often be caused by moisture in the wall which causes the old material (such as wallpaper) to leach through and create the visible marks on the wall. If you notice any wall ghosting, make sure to repair it with joint compound and sand it down for a smooth finish before repainting or applying new wallpaper. [4]
How can I make my walls warmer?
Adding insulation to your walls is the best way to make them warmer. You can either install insulation between the wall studs or have it professionally inserted behind the drywall. Another option is to add thermal curtains and blinds which can trap heat in the room and help keep your walls warm during winter months. Finally, if you’re looking for an energy-efficient solution, consider investing in a radiant heating system which will evenly distribute warmth throughout your entire home. [5]
What causes walls to become uneven?
Uneven walls can result from various factors, including settling of the foundation, poor construction, humidity changes, or even improper repairs in the past. These factors can lead to cracks, bulges, or dips in the wall surface.
Can I fix uneven walls on my own?
Simple cosmetic issues like minor cracks and imperfections can often be fixed with DIY methods such as patching compounds and sanding. However, for more severe unevenness or structural issues, it’s advisable to consult a professional contractor or plasterer.
How can I fix minor cracks and unevenness in my walls?
For minor cracks and unevenness, you can follow these steps:
1. Clean the area and remove loose debris.
2. Apply a high-quality patching compound to fill cracks and imperfections.
3. Sand the patched areas once they’re dry to achieve a smooth surface.
4. Prime and paint the patched areas to match the rest of the wall.
When should I seek professional help for fixing uneven walls?
If the unevenness is severe, involves structural issues, or keeps recurring after DIY repairs, it’s recommended to seek professional assistance. A contractor or plasterer can accurately assess the situation and provide appropriate solutions.
What if the unevenness is due to foundation problems?
If uneven walls are caused by foundation issues, it’s crucial to address the foundation problem first. Consult with a foundation specialist to identify the root cause and implement the necessary repairs. Once the foundation is stabilized, you can then address the wall unevenness.
Can painting or wallpapering hide uneven walls?
Painting or wallpapering can help to visually minimize minor unevenness, but they won’t actually fix the underlying issue. Before applying paint or wallpaper, it’s a good idea to address any structural or cosmetic problems to ensure a smooth and even surface.
What if the uneven walls are affecting my home’s resale value?
Significant wall unevenness can impact a home’s resale value. If you’re planning to sell your home, it’s wise to address noticeable issues before listing. Consulting with a professional can help you determine the best course of action to improve the appearance of your walls.
Can I prevent future wall unevenness?
To prevent future wall unevenness, it’s important to address any underlying issues promptly. Regular maintenance, avoiding excessive moisture, and using high-quality construction materials during repairs can help maintain the integrity of your walls.
Should I consider re-plastering or re-drywalling for severe wall unevenness?
Re-plastering or re-drywalling might be necessary for severe wall unevenness or when the existing materials are beyond repair. Consult with a professional to determine the best approach based on the condition of your walls and your desired outcome.
Useful Video: MUD FRAMING!! How to FIX CROOKED WALLS!!!
Conclusion
Uneven walls are a common problem in many homes. But there’s no need to worry because there are some easy ways to fix them! With a little time and effort, you can have your uneven walls looking like new in no time. Thanks for reading and we hope this article was helpful! If you have any questions or comments, feel free to leave them below. And if you know of any other methods for fixing uneven walls, please share them with us!
References
- https://constructionhow.com/how-to-fix-a-wall-that-is-not-straight/
- https://www.thedailygardener.com/what-is-wood-planer
- https://www.remodelista.com/posts/how-to-get-rid-of-textured-walls/
- https://www.redfin.com/blog/ghosting-on-walls-ceilings/
- https://homeguides.sfgate.com/keep-cold-out-bedroom-walls-31976.html