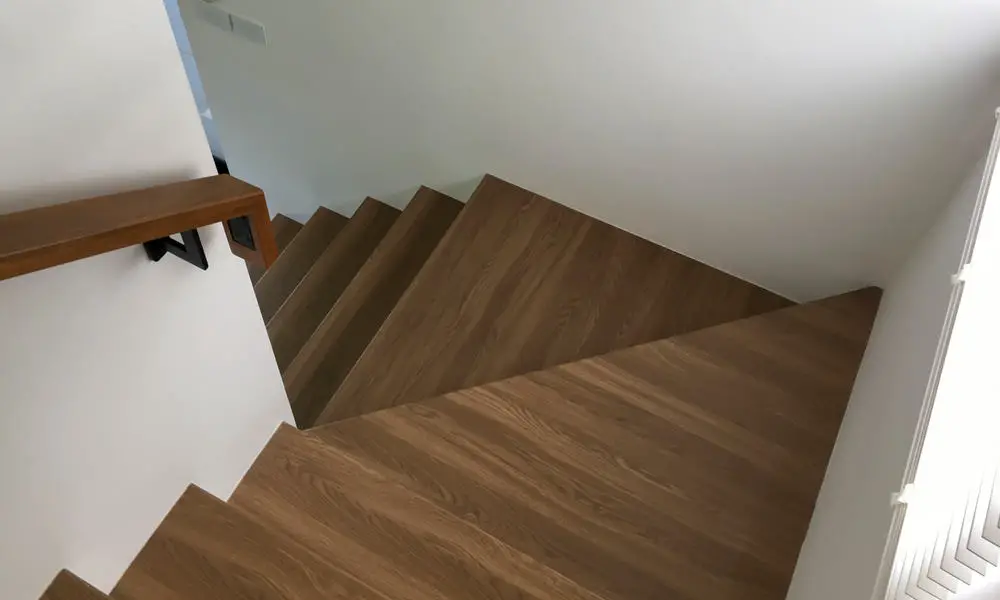
Installing vinyl on stairs with nosing is a great way to give your staircase an updated, modern look. Vinyl flooring is durable and easy to maintain, making it an ideal choice for busy households. With the right tools and materials, you can easily install vinyl on stairs with nosing in no time. This article will provide step-by-step instructions for how to do so correctly and safely. So grab your supplies and get ready to transform your stairway into something special!
Manufactured Treads And Risers
Before you begin installing vinyl on your stairs, you need to assess the current state of the stairway. If you have old manufactured treads and risers that are in good condition, you can simply lay down your vinyl directly onto them without any additional preparation. Make sure there are no rips or tears in the old material before continuing.
Tools
Before installing the vinyl, you will need to gather the following tools and materials:
- Vinyl flooring
- Utility knife
- Measuring tape
- Carpet tacks or adhesive glue
- Padding underlayment (optional)
- Nosing pieces (optional) [1]
Step By Step Guide To Install Vinyl Plank Flooring On Stairs
Let’s take a closer look at how you can make a vinyl floor on the stairs.
Preparation
- Measure the stairs and cut the vinyl according to the size of each stair.
- Mark a line across the top of each riser where you will attach your first row of plank flooring (nosing).
- Trim off any excess material from the bottom of each piece, leaving a small gap between them.
- Use a jigsaw to cut the vinyl plank flooring along the line you marked as nosing.
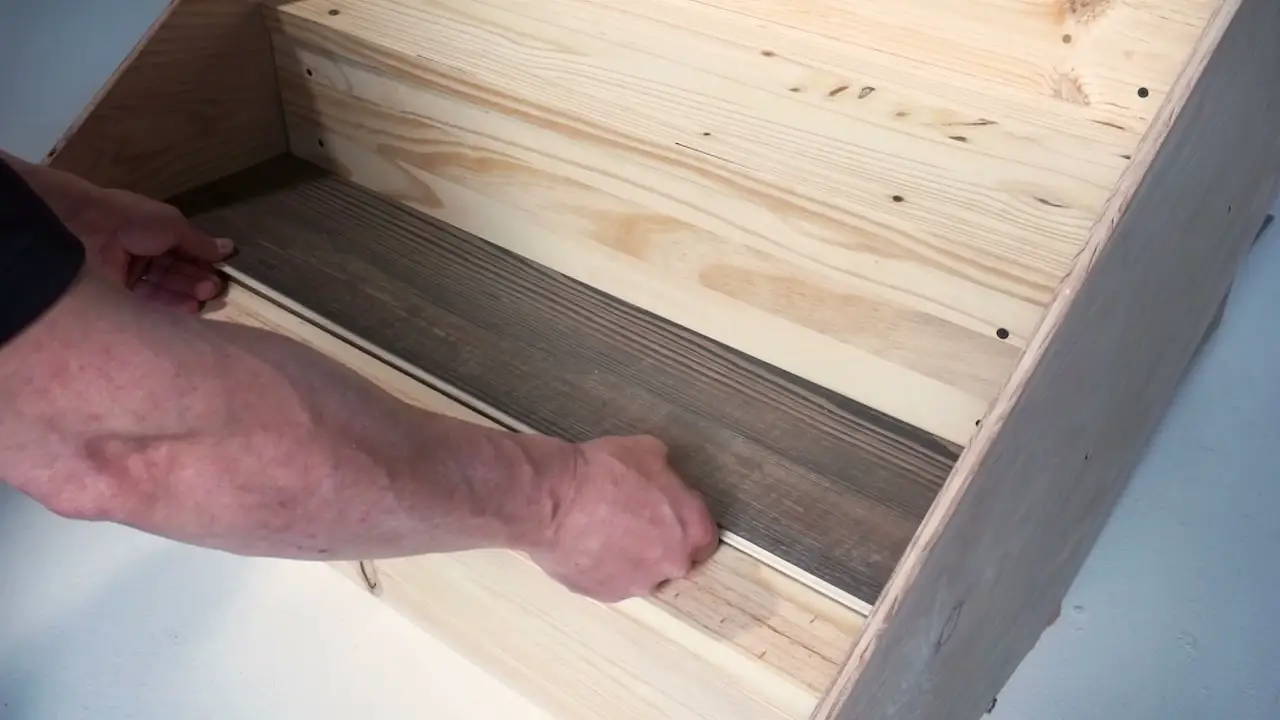
Begin By Installing The Stair Riser
Subsequent to adding the nosing, an essential step when laying vinyl on staircases is to install a staircase riser.To do this, you should attach a piece of plywood along the back of each step. This will provide a solid surface for your vinyl to adhere to and will also help secure the nosing in place. Use screws or nails that are designed for nailing into plywood, and be sure to sink them in deep enough that they won’t stick out above the surface of the plywood or vinyl.
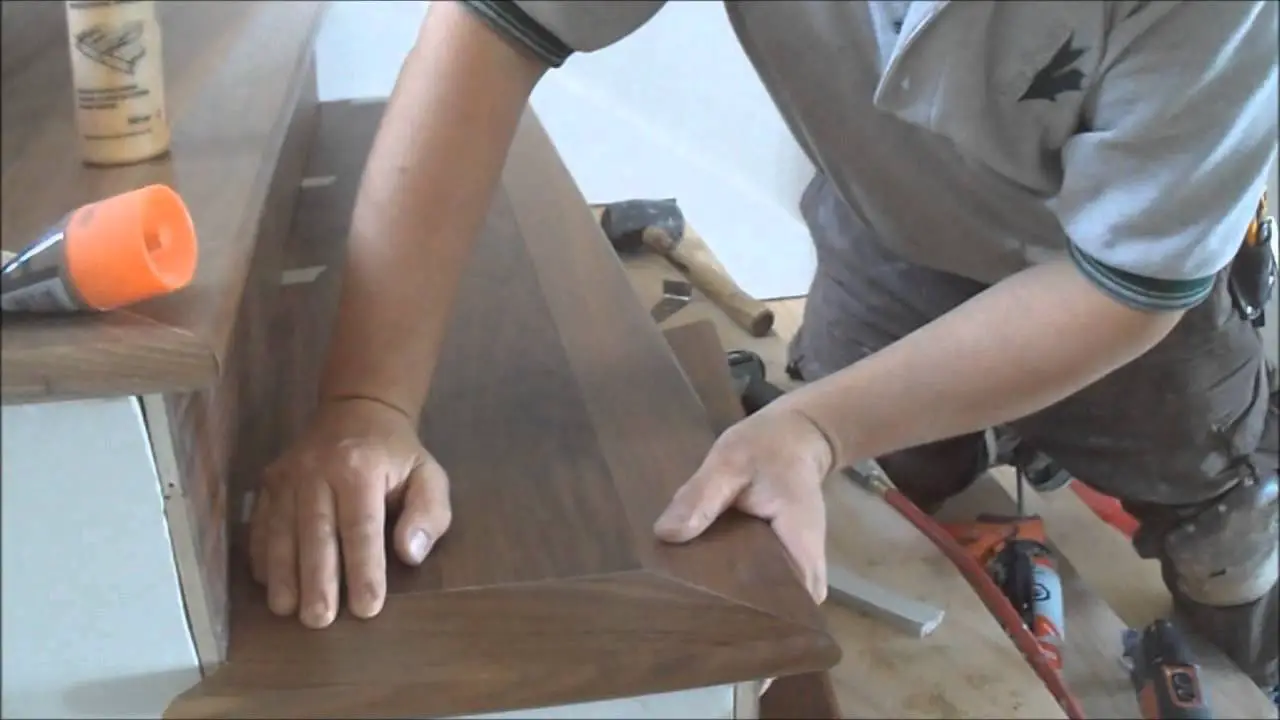
Go For The Tread And Stair Nose
The first step in installing vinyl on stairs with nosing is to measure and cut the treads. Measure the length of the stair treads, then cut them out of the vinyl sheet. Make sure they are slightly longer than the width of your stairs so that you can adjust if necessary. When you have finished cutting out your pieces, it is time to add the stair nosing. The nosing is a metal piece that will cover the raw edge of the vinyl, making it look finished and professional. Measure out the length and width of your stair nosing pieces, then cut them from the vinyl sheet.
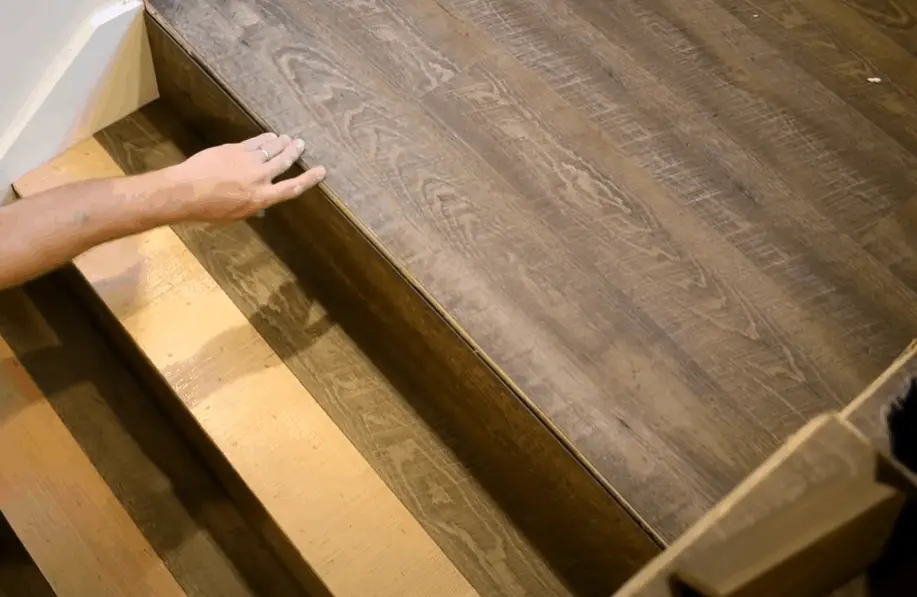
Now Install The Stair Tread
Installing the stair tread is an important step in completing a vinyl installation on stairs with nosing. To install the tread, begin by measuring and cutting the vinyl planks to fit your particular staircase dimensions. You should add two inches of extra length to each plank so that it can be fitted snugly over the sides and around any curves. Once the planks have been cut, use a vinyl adhesive to attach them securely to each stair tread riser. Make sure that any gaps between planks are filled and all edges are sealed with the adhesive.
Install The Stair Nose
Installing the stair nose correctly is vital for the success of your project. To do this, start by measuring and cutting its length to fit your stairs. It should extend beyond the edge of each step by about ¼ inch. Once sized properly, use a leveler to make sure it’s straight and secure it with nails or construction adhesive. If you’re working with prefinished stair nosing, it should already have a lip to help hold the vinyl in place.
Repeat The Steps
- Measure each stair tread and cut the vinyl plank to size, making sure to leave an extra 1/4 inch (6.5mm) of material on every side for expansion.
- Apply adhesive to the back of the plank, spreading it evenly with a notched trowel or spreader.
- Place the plank on the stair tread, pressing it firmly into place. Use a roller to ensure good contact between the vinyl and the wood or concrete beneath.
- Install nosing on each step by cutting it to size and attaching it with nails or screws (depending on the material).
- Trim off any excess material from around the edges of the nosing with a utility knife.
- Repeat steps 1-5 for each step in your staircase until all stairs are finished.
- Allow at least 24 hours for the adhesive to cure before adding any weight or traffic to your stair treads.
What If Your Staircase Is A Landing?
If your staircase is a landing, installing vinyl flooring can be slightly more complicated. Before beginning to install the vinyl on the stairs with nosing, you need to calculate how much material you will require and make sure that all of the measurements are correct. To properly measure for this type of installation:
- Measure the width of the landing, accounting for any dips or irregularities.
- Measure the length from the nosing to the wall along each side of the staircase.
- Measure from one side to the other going up and down each stair step.
- Add all measurements together and round up to determine your total square footage needed for vinyl flooring installation on a landing staircase. Once you have the required amount of vinyl flooring, begin by applying a bonding adhesive to the entire stair surface, covering both the tread and riser. [2]
Stair Nose Alternative
Stair nose, while essential in a vinyl installation on stairs, isn’t the only option. You can also use stair trim or quarter round molding as an alternative to traditional stair nosing. Trim and quarter round molding are available in various materials and styles, so you’ll have plenty of options when it comes to completing your staircase. When installing either of these alternatives, trim and quarter round molding should be applied to the edge of each step before laying down your vinyl planks. Both stair trim and quarter round will help cover any gaps between the vinyl planks and the side walls or risers of your staircase, giving you a neat and finished look.
Luxury Vinyl Plank Flush Stair Nose
Installing luxury vinyl plank (LVP) on stairs with a flush stair nose requires precision and patience. Here, we’ll explain the process of installing LVP on stairs that have already been prepared with risers, treads, and nosing.
Before you begin installation, make sure to lay out each plank before cutting it so that you can ensure the pattern is consistent and attractive.
- Start installing the planks at the top of the stairs with a piece that fits flush against the nosing.
- Secure each plank in place by tapping it gently with a rubber mallet firmly along the tongue-and-groove edges.
- Cut the end of each plank to fit tightly against the flush stair nose. You may need to trim the planks lengthwise as you go.
- Secure each plank in place with a compatible construction adhesive and flooring staples for extra durability.
- Finish off your installation by applying a matching quarter round molding to the end of each plank. [3]
How To Cut Vinyl Stair Nose
To ensure a perfect fit, the vinyl stair nosing must be cut to size before installation. To begin this process, measure each step of your staircase and mark the area where you will cut the nosing with a pencil.
Using a jigsaw, carefully cut along the marked line to ensure that the nosing fits correctly on each step. If you need extra precision, you can use a miter saw to make angled cuts.
Once your nosing is cut correctly, it’s time to start the installation process. To do this, apply an adhesive glue or contact cement onto the back of the nosing and then press it firmly against the stair tread. If you’re using adhesive glue, allow the nosing to dry for twenty-four hours before using stairs or walking on it.
Finally, use a utility knife to trim off any excess vinyl from the edges of the stair nose and your installation is complete! You should now have a safe and attractive looking staircase with beautiful vinyl stair nose.
Tips To Install Vinyl On Stairs With Nosing?
- Before you start, make sure that the stairs are clean and free of dirt or debris. Before installing, be sure to wipe down the stairs with a damp cloth in order to remove all dust and dirt.
- Measure the width and length of each stair tread and mark where the nosing will be installed. Use your measurements to cut the nosing to the correct length.
- Apply a thin layer of adhesive to the stair tread, making sure to cover completely where the nosing will be placed. Allow it to dry before continuing with your installation.
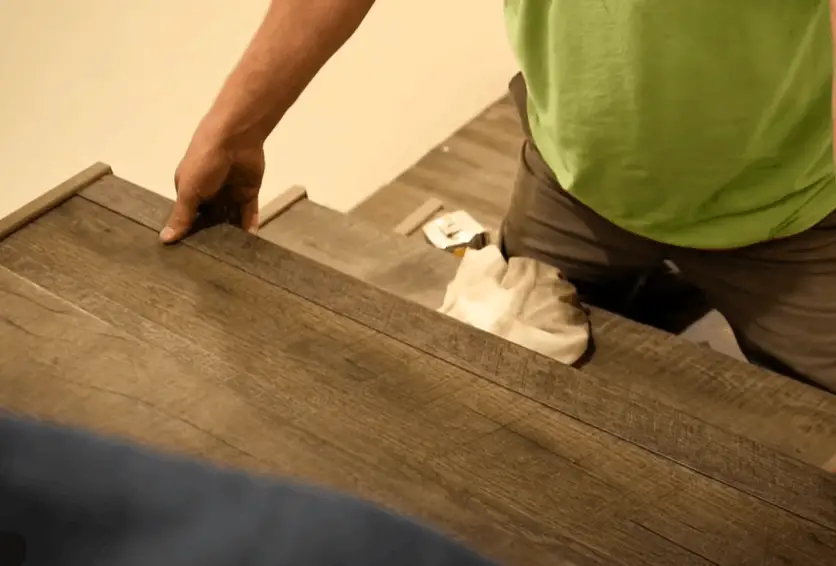
- With your cut nosing piece in hand, place it on top of the adhesive that you applied earlier. Make sure it is even with the stairs, and press it firmly into place.
- Secure the nosing to the stair treads by installing nails at an angle into the edge of each step. If you want additional security, you can also use a hammer and finishing nails along the edges of each stair tread.
- Apply a thin layer of adhesive to the back of each nosing piece before placing it on the stair treads. This will help the vinyl adhere better and prevent it from slipping or shifting over time.
- Cut your vinyl pieces slightly larger than the area you are covering, as this will allow for some overlap and a more secure fit.
- Peel back the backing of your vinyl pieces and place them on top of the nosing, making sure to line up the edges with the treads. [4]
FAQ
How do you attach a vinyl stair nose?
To attach a vinyl stair nose to the steps, use an industrial adhesive designed for vinyl. Begin by scraping off any old glue or other residue on the edge of the stairs and nosing. Then, spread a thin layer of adhesive to both surfaces. Firmly press the stair nosing into place, and hold it in place for a few minutes until the adhesive begins to dry. For best results, you may consider using clamps or weights to keep the stair nosing in place while it is drying. Allow 24 hours for the adhesive to fully set before using the stairs.
How do you install laminate flooring on stairs with nosing?
Installing laminate flooring on stairs with nosing is a relatively straightforward process, but requires attention to detail. It can also be time consuming. To install laminate flooring on stairs with nosing, you will need to:
- Measure and cut the laminate pieces to fit the stair treads.
- Install a layer of underlayment on each step before laying down the laminate flooring pieces.
- Attach the nosing to each stair tread before placing the laminate flooring pieces.
- Install tack strips along the edges of each step where the laminate flooring will be attached.
- Secure each piece of laminate flooring to the stairs using either nails or screws.
- Seal the seams between each piece of laminate flooring using a bead of construction adhesive.
- Finally, finish off the job by trimming any excess laminate flooring and caulking the edges of each stair tread.
How do you install stair nosing on stairs?
Installing stair nosing on stairs is an important step in the overall process of installing vinyl stair treads. Stair nosing is a type of trim that is placed on the edge of the stair treads to provide a finished look and prevent the vinyl from peeling off.
The first step is to measure the length of your stair treads. Measure from the front edge of the stair to the back. This measurement will help you determine which type of nosing you should use for your stairs. Next, you will need to cut the nosing to length. Most stair nosings come in standard lengths and you can use a miter saw to trim them down if necessary.
What is the best glue for vinyl stair nosing?
The best glue to use for vinyl stair nosing is a high-strength construction adhesive. You should look for an adhesive that can withstand moisture, heat and cold temperatures without breaking down or losing its grip. It’s also important to use an adhesive that is waterproof, so it won’t be affected by damp conditions. Popular brands of construction adhesive include Loctite PL Premium, Liquid Nails and Gorilla Glue.
Do you glue stair nosing?
Yes, you should glue stair nosing when installing vinyl flooring on stairs. Stair nosing is an important part of the installation process as it helps to provide a finished look and protect the edges of your vinyl flooring from becoming damaged. It also helps create a seamless transition between the stair treads and the vinyl flooring.
Do you need a stair nose on every step?
It is usually recommended to install a stair nose on every step when installing vinyl on stairs. This helps give your staircase the finished look that you’re hoping for and helps keep the stairs safe and secure. Stair noses can also help protect your vinyl from wear, as well as keep dust and debris from gathering on your stairs. When installing stair noses, make sure to use the correct screws and adhesives that are designed specifically for the vinyl and stair nose.
How do you bend vinyl planks for the stairs nose?
Bending vinyl planks for the stairs nose is a tricky process, but it can be done. To begin, measure out the desired length of the nose and mark it on the plank. Then, place the plank between two pieces of wood or other sturdy material at a slight angle so that the plank is bent below the mark. Secure both pieces of wood with clamps, then heat the area that needs to be bent. Once the vinyl has softened, press down on the plank to create the bend. Once cooled, remove clamps and inspect for any burrs or other damage that may have occurred.
How do you cover stairs with vinyl flooring?
Installing vinyl flooring on stairs is one of the trickiest home improvement projects you can undertake. It requires a lot of precision and special tools to complete the job successfully. But it can be done! Here is a step-by-step guide on how to install vinyl flooring on stairs with nosing:
- Measure the dimensions of your stairs and purchase enough vinyl to cover them. Make sure you get extra material to allow for cutting and waste.
- Make sure the stairs are clean, dry and free of any dirt or debris. It is also important to level any uneven stairs.
- Now you can start installing the vinyl flooring on the stairs. Begin by measuring and cutting the first strip of vinyl to fit the length of the stairs.
- Use a metal straight edge or trowel to spread adhesive onto the stair nosing.
- Place the vinyl strip onto the stairs, and press firmly along the length of the stairs. Use a roller to ensure a strong bond between the vinyl and the nosing.
- Continue this process until all of the stairs have been covered with vinyl flooring strips. Make sure that each strip is firmly pressed down and that there are no gaps between the strips.
- For a finished look, use a vinyl stair nosing to cover the edge of the stairs.
- To finish, wait for the adhesive to dry thoroughly before stepping onto the stairs.
Do you have to glue laminate on the stairs?
Yes, it is recommended that you glue laminate flooring to the stairs with a contact adhesive specifically designed for laminate. When gluing the stairs, you’ll need to cover the entire surface with a thin layer of adhesive before laying the laminate on top. Make sure that all edges are tightly fit together, and use a damp cloth to smooth out any air bubbles. To ensure a safe and secure staircase, be sure to give the adhesive ample time to completely dry before you step foot on it.
How do you install vinyl planks on top of stairs?
When installing vinyl planks on top of stairs, the nosing is usually the most difficult part. To begin, you will need to measure the steps and cut the vinyl accordingly. Next, use a utility knife to score and cut the nosing from a vinyl plank that matches the size of your stair tread. You can then install the nosing using a construction adhesive, making sure to firmly press it into place so that it is secure. Once the nosing is in place, you can install the vinyl planks on each tread, overlapping them slightly as you go up the stairs.
For a complete finish, use vinyl trims and cove caps at the edges of each step to give it a seamless appearance. With proper installation and care, vinyl planks can provide a durable and protective covering for stairs.
Useful Video: How To Install Vinyl Plank Flooring On Stairs
Conclusion
Installing vinyl on stairs with nosing is a relatively simple task that requires basic tools and materials. With this guide as your roadmap, it’s easy to install the product quickly and successfully. Take your time with each step of the project to guarantee that it turns out looking attractive and stands up to wear-and-tear. Remember to double-check measurements, adhere the vinyl securely, and trim along the edges for a professional-looking finish. With these tips, you should be able to install vinyl on stairs with nosing in no time.
References
- https://www.thespruce.com/installing-a-stair-nosing-strip-1822570
- https://www.whatisvinyl.com/installing-vinyl-plank-flooring-on-stairs/#Step_by_step_guide_to_Install_Vinyl_Plank_Flooring_on_Stairs
- https://www.flooringclarity.com/install-vinyl-plank-on-stairs/
- https://www.flooringinc.com/blog/install-flooring-on-stairs/