Is your Nest Thermostat not cooling? This can be a frustrating problem to have, but fortunately it’s usually easy to fix. In this article, we will walk you through the most common causes of this issue and how to solve them. We will also cover some troubleshooting tips in case the problem is more difficult to diagnose. So don’t worry – if your Nest isn’t keeping you cool, we’ll help you get it fixed up!
Mislabelled Thermostat Wires
The most common cause of a Nest Thermostat not cooling is mislabelled wires. If the Nest isn’t getting enough power, it won’t be able to run the cooling system properly. To check if this is the problem, take a look at the wire labels on your Nest. They should be clearly labelled with letters (e.g. “R” for red, “G” for green). If they are not, or if you’re unsure of which wire goes where, consult your Nest’s manual or reach out to customer support. Once you have confirmed that the wires are properly labelled, turn your Nest back on and see if the issue has been resolved.
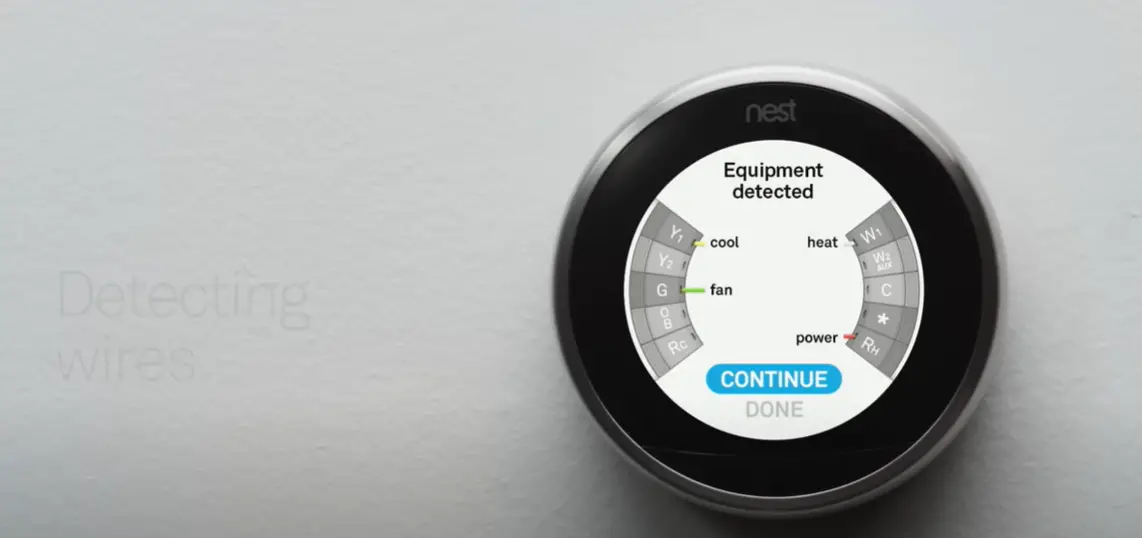
If you’re still having trouble after relabelling the wires, the next step is to check that all of the wires are connected tightly to their terminals. Loose connections can cause power issues, so it’s important to make sure that everything is snug. To do this, simply remove each wire from its terminal and then reconnect it. Make sure that you hear a “click” when you push the wire in, as this indicates that it is securely in place. Once you have checked all of the connections, turn your Nest back on and see if the issue has been resolved.
Correctly Identify Your Home Cooling System
Another common cause of a Nest Thermostat not cooling is an incorrect cooling system selection. When you set up your Nest, you’re asked to select the type of cooling system that you have in your home. It’s important to choose the correct option, as this will ensure that your Nest is able to control your AC unit properly. If you’re not sure which option to choose, consult your Nest’s manual or reach out to customer support.
If you’ve selected the wrong cooling system type, the best way to fix the problem is to reset your Nest and start the setup process over again. This will allow you to correctly identify your home’s cooling system so that your Nest can control it properly. To reset your Nest, simply hold down the button for 10 seconds. This will initiate a factory reset, which will erase all of your Nest’s settings. Once the reset is complete, you can start the setup process again and choose the correct cooling system type.
Relabel Old Thermostat Wiring
If your old thermostat was wired using the “common” wire, you’ll need to relabel it before you can use it with Nest. This is because the common wire provides power to the Nest Thermostat, and without it, your Nest will be unable to turn on or control your AC.
To relabel the common wire:
- Cut off the green ground wire from your old thermostat. You won’t need this anymore.
- Remove the Nest Thermostat from its base plate.
- Find the blue and white wires connected to the RC and RH terminals on your old thermostat. These are probably labeled as “C” and “H”.
- Twist the blue wire around the white wire.
- Screw the wires back into the RC and RH terminals on your old thermostat.
- Put the Nest Thermostat back on its base plate.
Rewire Nest Thermostat
If your Nest thermostat isn’t cooling, it could be because the wires are loose. To fix this, you’ll need to remove the Nest plate and check that all the wires are securely connected to their terminals. If any of the wires are loose, simply tighten them down.
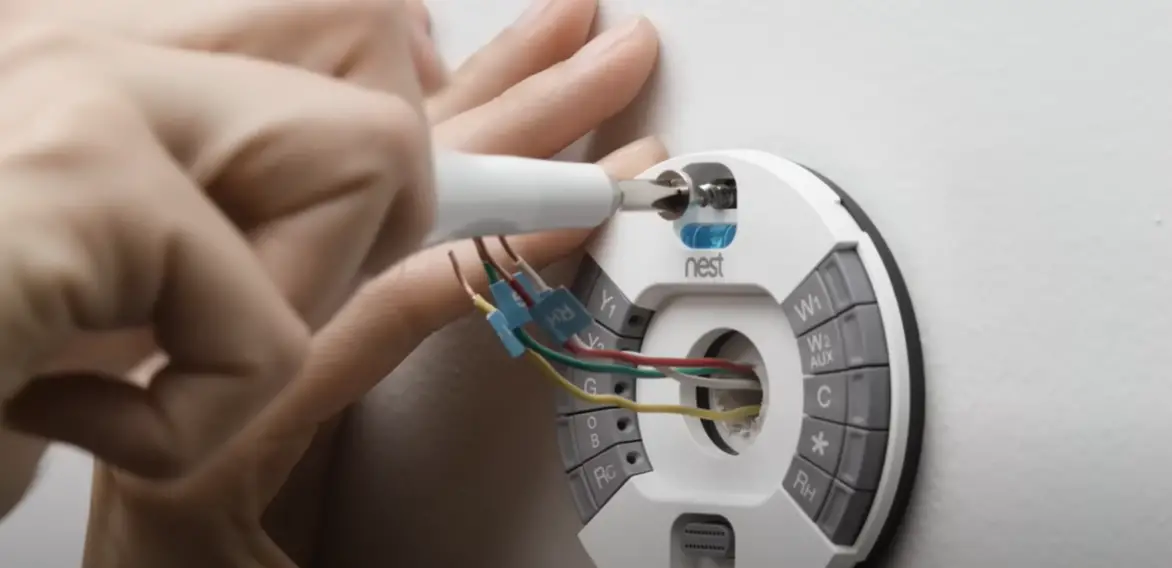
If that doesn’t solve the problem, then you may need to rewire your Nest thermostat. This is a more involved process, but it’s not too difficult if you’re familiar with basic electrical work. First, turn off the power to your HVAC system at the breaker box. Then, remove the Nest plate and unscrew the wire terminals.
Next, take a picture of how the wires are currently connected so you can reference it later. Then, disconnect all the wires and reattach them to the Nest thermostat in the order specified by Nest. Finally, screw the wire terminals back into place and turn on the power to your HVAC system.
Tripped Circuit Breaker
If your Nest thermostat isn’t cooling and you’ve checked all of the above, then the next step is to check your circuit breaker. If the breaker has tripped, then it may be preventing power from reaching your Nest thermostat. To fix this, simply flip the breaker back into the ON position.
If the problem persists, then you may need to replace the circuit breaker. This is a more involved process, so if you’re not comfortable doing it yourself, you can always hire an electrician to do it for you.
RC, RH Wiring Issue
If you have an “RC” or “RH” wire connected to your Nest Thermostat, it means that your system uses a 24-volt common wire to complete the circuit. If this wire is loose or disconnected, your Nest Thermostat will not be able to receive power and control your AC unit.
To fix this issue:
- First, check to make sure that the “RC” or “RH” wire is securely connected to the “C” terminal on your Nest Thermostat.
- If the wire is loose, use a screwdriver to tighten the connection.
- If the wire is disconnected, reconnect it to the “C” terminal.
Blown Fuse Inside Air Handler
The air handler is the part of your AC unit that blows air through the vents in your home. If there is a blown fuse inside the air handler, it may be preventing power from reaching your Nest Thermostat. To fix this, you’ll need to replace the fuse with a new one.
To do this, first, turn off the power to your AC unit at the breaker box. Then, locate the fuse inside the air handler and remove it. Once you have removed the old fuse, insert a new one in its place. Finally, turn on the power to your AC unit and check to see if the issue has been resolved.
If the problem persists, then you may need to replace your Nest thermostat.
Additional Troubleshooting Ideas
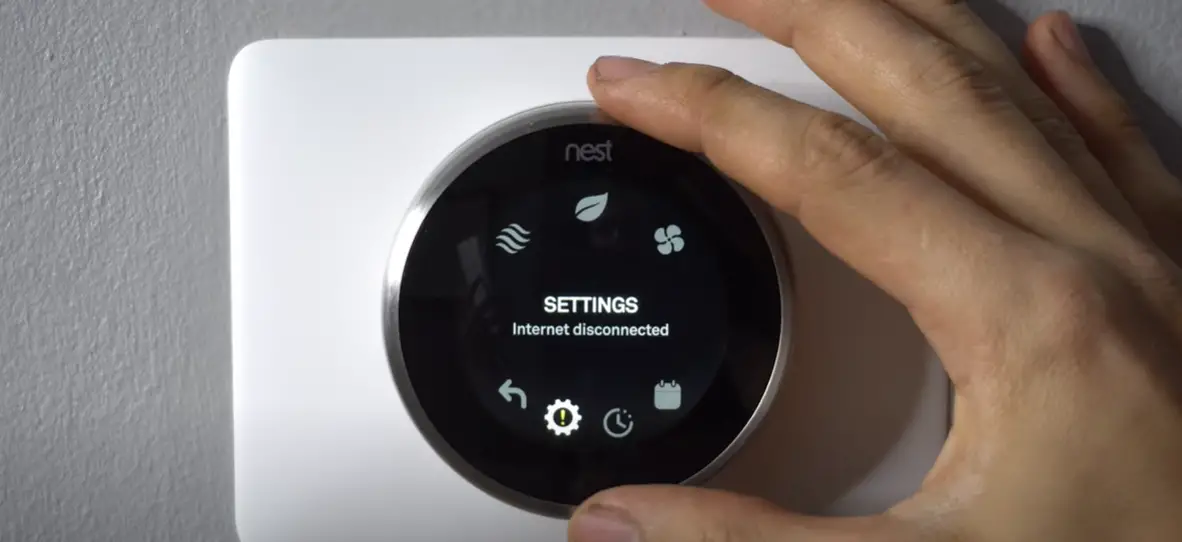
If you’ve tried all of the above and your Nest thermostat still isn’t cooling, then you may need to contact a professional for help. In the meantime, here are a few additional troubleshooting ideas:
- Check to see if the Nest app is up-to-date. If not, update it and see if that helps.
- Try restarting your Nest thermostat. To do this, simply remove it from its base plate and then put it back on.
- If you have more than one Nest thermostat, try moving it to a different location in your home. Sometimes, certain areas can interfere with the signal and cause problems.
- Make sure that there aren’t any objects blocking the vents on your Nest thermostat. Sometimes, things like furniture can block the vents and prevent airflow.
- Check to see if your home’s Wi-Fi network is down. If it is, then that may be preventing your Nest thermostat from connecting to the internet and receiving updates.
- Try factory resetting your Nest thermostat. This will erase all of your settings and restore the thermostat to its default state. To do this, simply remove the Nest plate and press and hold the button for 10 seconds.
Check Nest Compatibility with Your Cooling System
The Nest thermostat is compatible with most major cooling systems, but there are a few exceptions. If you’re not sure whether or not your system is compatible, you can check Nest’s compatibility list.
If your system isn’t compatible with Nest, then you won’t be able to use the thermostat to control your AC unit. In this case, you’ll need to purchase a different thermostat that is compatible with your system.
Restart the System
If your Nest thermostat is still not cooling, you can try restarting the system. To do this, simply turn off the power to your AC unit at the breaker box. Then, wait for a few minutes and turn it back on. This should reset the system and hopefully fix the problem.
If the issue persists, then you may need to replace your Nest thermostat.
Reinstall Your Old Thermostat
If your old thermostat was working fine before you replaced it with a Nest, the problem may be with the installation. Try removing your Nest and reinstalling your old thermostat. If that doesn’t work, then you know the issue is with your Nest.
There are a few things you can try to fix a Nest Thermostat that’s not cooling:
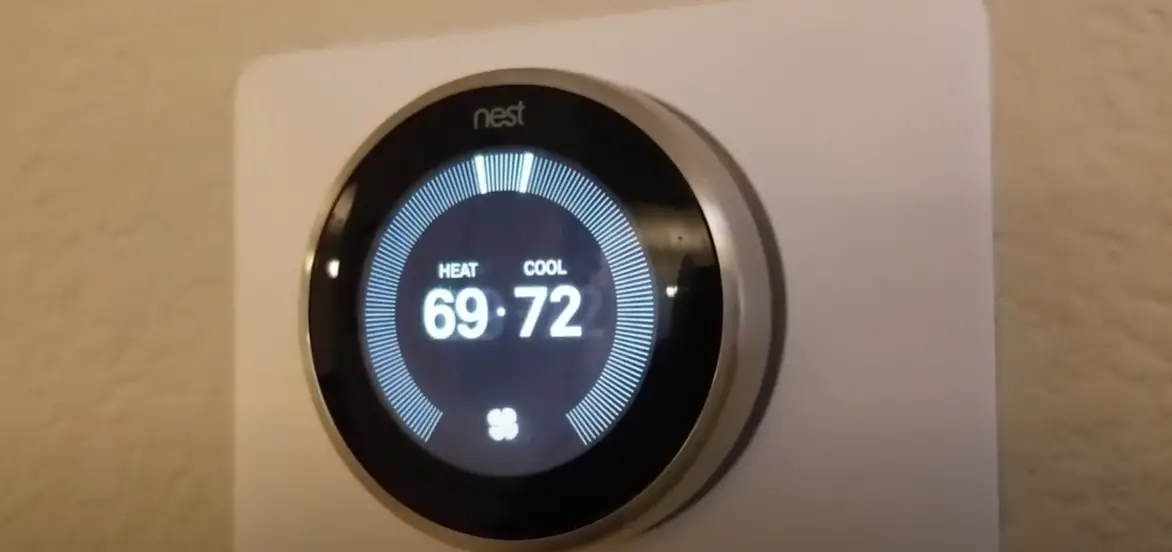
- First, check to make sure that the Nest is set to “Cool” mode. You can do this by pressing the “Mode” button on the front of the device. The display should show a snowflake icon next to the word “Cool” if it’s in the right mode.
- If the Nest is already in “Cool” mode, try turning the temperature down a few degrees. Sometimes the Nest will get stuck in a “heat mode” and needs to be reset by changing the temperature.
- If those two options don’t work, try restarting your Nest by pressing the “Home” button on the front of the device for about 10 seconds. This will reset the device and hopefully fix the problem.
- Finally, if none of those options work, you may need to factory reset your Nest. To do this, press and hold the “Nest” button on the back of the device for about 10 seconds. The display should show a spinning circle, and then the Nest will restart.
If you’ve tried all of those options and your Nest is still not cooling, then you may need to contact customer support for help.
Comparison of Nest Thermostat Not Cooling Indicators
The table below provides a comparison of various indicators related to Nest Thermostat not cooling issues. The data presented in this table is measured in the imperial system.
The table includes several key indicators that can help diagnose and troubleshoot cooling problems with Nest Thermostats. Each indicator represents a specific aspect of the cooling functionality and provides insights into potential issues that may be causing the problem.
| Indicator | Normal Range | Observed Value | Possible Issue |
|---|---|---|---|
| Temperature Setting | 68°F – 78°F | 76°F | Incorrect temperature setting |
| Ambient Temperature | Dependent on climate | 82°F | High ambient temperature |
| Thermostat Power | 24V AC | No power | Power supply issue |
| Air Filter | Clean | Dirty | Clogged air filter |
| Refrigerant Level | Proper level | Low | Refrigerant leak |
In this table, the indicators include Temperature Setting, Ambient Temperature, Thermostat Power, Air Filter, and Refrigerant Level. The “Normal Range” column specifies the expected range for each indicator under normal conditions. The “Observed Value” column displays the measured value for each indicator. The “Possible Issue” column provides a potential explanation for the observed value that may be causing the Nest Thermostat not cooling problem.
FAQ
Why is my thermostat on but not cooling?
One of the most frustrating things that can happen during the hot summer months is when your thermostat is on but not cooling. Before you call a repairman, there are a few things you can check to see if you can fix the problem yourself.
First, make sure that the batteries in your Nest Thermostat are fresh. If they’re not, this could be why your thermostat isn’t cooling. To replace the batteries, simply remove the back plate of your Nest and insert new AA batteries.
If fresh batteries don’t do the trick, then the next thing to check is whether or not your Nest is connected to Wi-Fi. For your Nest to cool your home, it needs to be connected to the internet so that it can receive updates and commands from the Nest app. To check your Wi-Fi connection, open the Nest app and go to the Settings menu. From there, select “Network & Accounts” and make sure that your Wi-Fi network is selected.
If you’re still having trouble after checking these two things, then the next step is to try restarting your Nest Thermostat. To do this, simply hold down the Nest button for about 10 seconds until you see the message “Please wait…” appear on the screen. Once your Nest has restarted, it should start cooling properly.
Why is my AC not working with Nest?
One of the most common issues that people have with their Nest Thermostat is that it stops working with their AC unit. If this happens, the first thing you should check is to make sure that your AC unit is compatible with Nest. You can find a list of compatible units on Nest’s website.
If your AC unit is still not working, then you may need to reset your Nest Thermostat.
If you’ve tried all of these things and your AC unit still isn’t working with your Nest, then you may need to contact customer support for help.
Should I turn my AC off if it’s not cooling?
If your AC isn’t cooling, the first thing you should do is turn it OFF. Don’t keep running it in the hopes that it will magically start cooling again. This can end up making the problem worse and could lead to costly repairs. [1]
Why does Nest take 2 hours to cool?
Nest takes two hours to cool for a variety of reasons. The most common reason is that the Nest is not placed in an optimal location. If the Nest is placed in direct sunlight or near a heat source, it will take longer to cool down. Another common reason is that the Nest’s sensors are dirty or covered, preventing the thermostat from accurately detecting the temperature. Finally, if the Nest is connected to an AC unit that is too small for the size of the room, it will take longer to cool down. [2]
What does pre-cooling mean on Nest?
Pre-cooling is a feature on the Nest that allows you to set your thermostat to start cooling your home before you arrive. This is useful if you want your home to be cool when you get back from work or if you know it will be hot outside and you want to beat the heat.
To use pre-cooling, open the Nest app and go to the Settings menu. From there, select “Preferences” and then turn on “Pre-Cooling.” You can then set the temperature and time that you want your Nest to start cooling. [3]
Why does the Nest delay cooling?
The most common reason for the Nest delay in cooling is due to the “cool to dry” feature. This feature is designed to prevent the Nest from cooling your home too quickly, which can cause discomfort and wasted energy. The “cool to dry” feature will engage if the Nest detects that the humidity in your home is too high. When this happens, the Nest will slow down the cooling process so that it doesn’t remove too much moisture from the air, which can make your home feel stuffy. [4]
Is there a battery in a Nest thermostat?
No, there is no battery in the Nest thermostat. The Nest gets its power from a wire that is connected to your AC unit. If you lose power to your AC unit, then the Nest will lose power as well.
Why is my Nest thermostat not cooling?
There can be several reasons why your Nest thermostat is not cooling. Here are a few possible causes:
- The temperature settings on your Nest thermostat may not be set correctly. Double-check the desired temperature and ensure it is set lower than the current room temperature.
- Check if your Nest thermostat is in “Heat” mode instead of “Cool” mode. Make sure the mode is set correctly to enable cooling.
- Verify that your cooling system is properly connected to the Nest thermostat. Check the wiring connections and ensure they are secure and correctly installed.
- Check the air filters in your HVAC system. Clogged or dirty filters can restrict airflow and hinder the cooling process. Clean or replace the filters if necessary.
- Ensure that your cooling system is functioning correctly. Check if the compressor, fan, and other components are operating as they should. If you suspect an issue with your cooling system, contact a professional HVAC technician for assistance.
- Check the power supply to your Nest thermostat. Ensure it has a stable connection and is receiving power. A loose or faulty power connection can prevent the thermostat from functioning properly.
Why is my Nest thermostat blowing warm air instead of cold air?
If your Nest thermostat is blowing warm air instead of cold air, consider the following possibilities:
- Check the temperature settings on your Nest thermostat. Ensure that the desired temperature is set lower than the current room temperature.
- Verify that your cooling system is set to “Cool” mode and not “Heat” mode. Incorrect mode settings can result in warm air being circulated.
- Check if your cooling system’s condenser unit is running. If it’s not functioning, warm air will be blown into your home. In such cases, it’s advisable to contact a professional HVAC technician to diagnose and repair the issue.
- Inspect the outdoor unit of your cooling system. Clear any debris or obstructions around the unit, as they can impede its performance and cause warm air to be blown.
- Examine the wiring connections between your cooling system and the Nest thermostat. Ensure they are securely connected and properly installed.
Why is my Nest thermostat cooling intermittently?
If your Nest thermostat is cooling intermittently, it could be due to the following reasons:
- Check if the temperature differential setting on your Nest thermostat is configured correctly. This setting determines the temperature range within which the system should turn on or off. Adjusting this setting may resolve the intermittent cooling issue.
- Inspect the air filters in your HVAC system. Dirty or clogged filters can obstruct airflow and lead to inconsistent cooling. Clean or replace the filters if necessary.
- Verify that the cooling system’s condenser unit is functioning properly. If it’s experiencing issues, such as a faulty compressor or refrigerant leak, it may cause intermittent cooling. In such cases, it’s recommended to consult a professional HVAC technician for diagnosis and repair.
- Check the wiring connections between your cooling system and the Nest thermostat. Loose or improper connections can result in intermittent cooling. Ensure the connections are secure and correctly installed.
- Review the scheduling settings on your Nest thermostat. Make sure there are no conflicting temperature schedules that may be causing the intermittent cooling.
Useful Video: Nest Thermostat Blowing Hot Air on Cool After Installation
Conclusion
If your Nest thermostat isn’t cooling, there are a few different things you can try to fix the issue. First, make sure that the power supply is working and that the thermostat is turned on. Then, check to see if the temperature settings are correct. Finally, contact customer service if the problem persists. By following these steps, you should be able to fix your Nest Thermostat so it starts cooling again.
References
- https://www.daycosystems.com/blog/air-conditioning-service/should-i-turn-off-my-ac-if-it-is-not-cooling/
- https://smarthomestarter.com/why-does-my-nest-thermostat-say-in-2-hours-and-if-it-continues/
- https://support.google.com/googlenest/answer/9246532?hl=en
- https://myautomatedpalace.com/should-you-use-cool-to-dry-on-a-nest/








Leave a Reply